You can create expense claims in two ways: automatically, by adding a note like “expense” when you upload a receipt, or manually, by grouping invoices from the invoice inbox. Either way, expense claims group multiple invoices into a single claim for an employee, and once created, the expense claim can be published directly into Xero or Quickbooks.
Create expense claims automatically
Add a note mentioning “expense” (e.g. “expense for Sam”, “this is an expense”, or just “expense”) when you upload a receipt — via the web, WhatsApp, or email — and Briefcase takes care of the rest:
Briefcase analyses your note, identifies the upload as an expense claim, and extracts the claimant name if provided.
The invoice is processed as usual — extracting line items, categorising, and assigning VAT.
Instead of autopublishing, Briefcase finds or creates a monthly expense claim for the claimant based on the invoice date.
The transaction is linked to the expense claim, ready for you to review and publish.
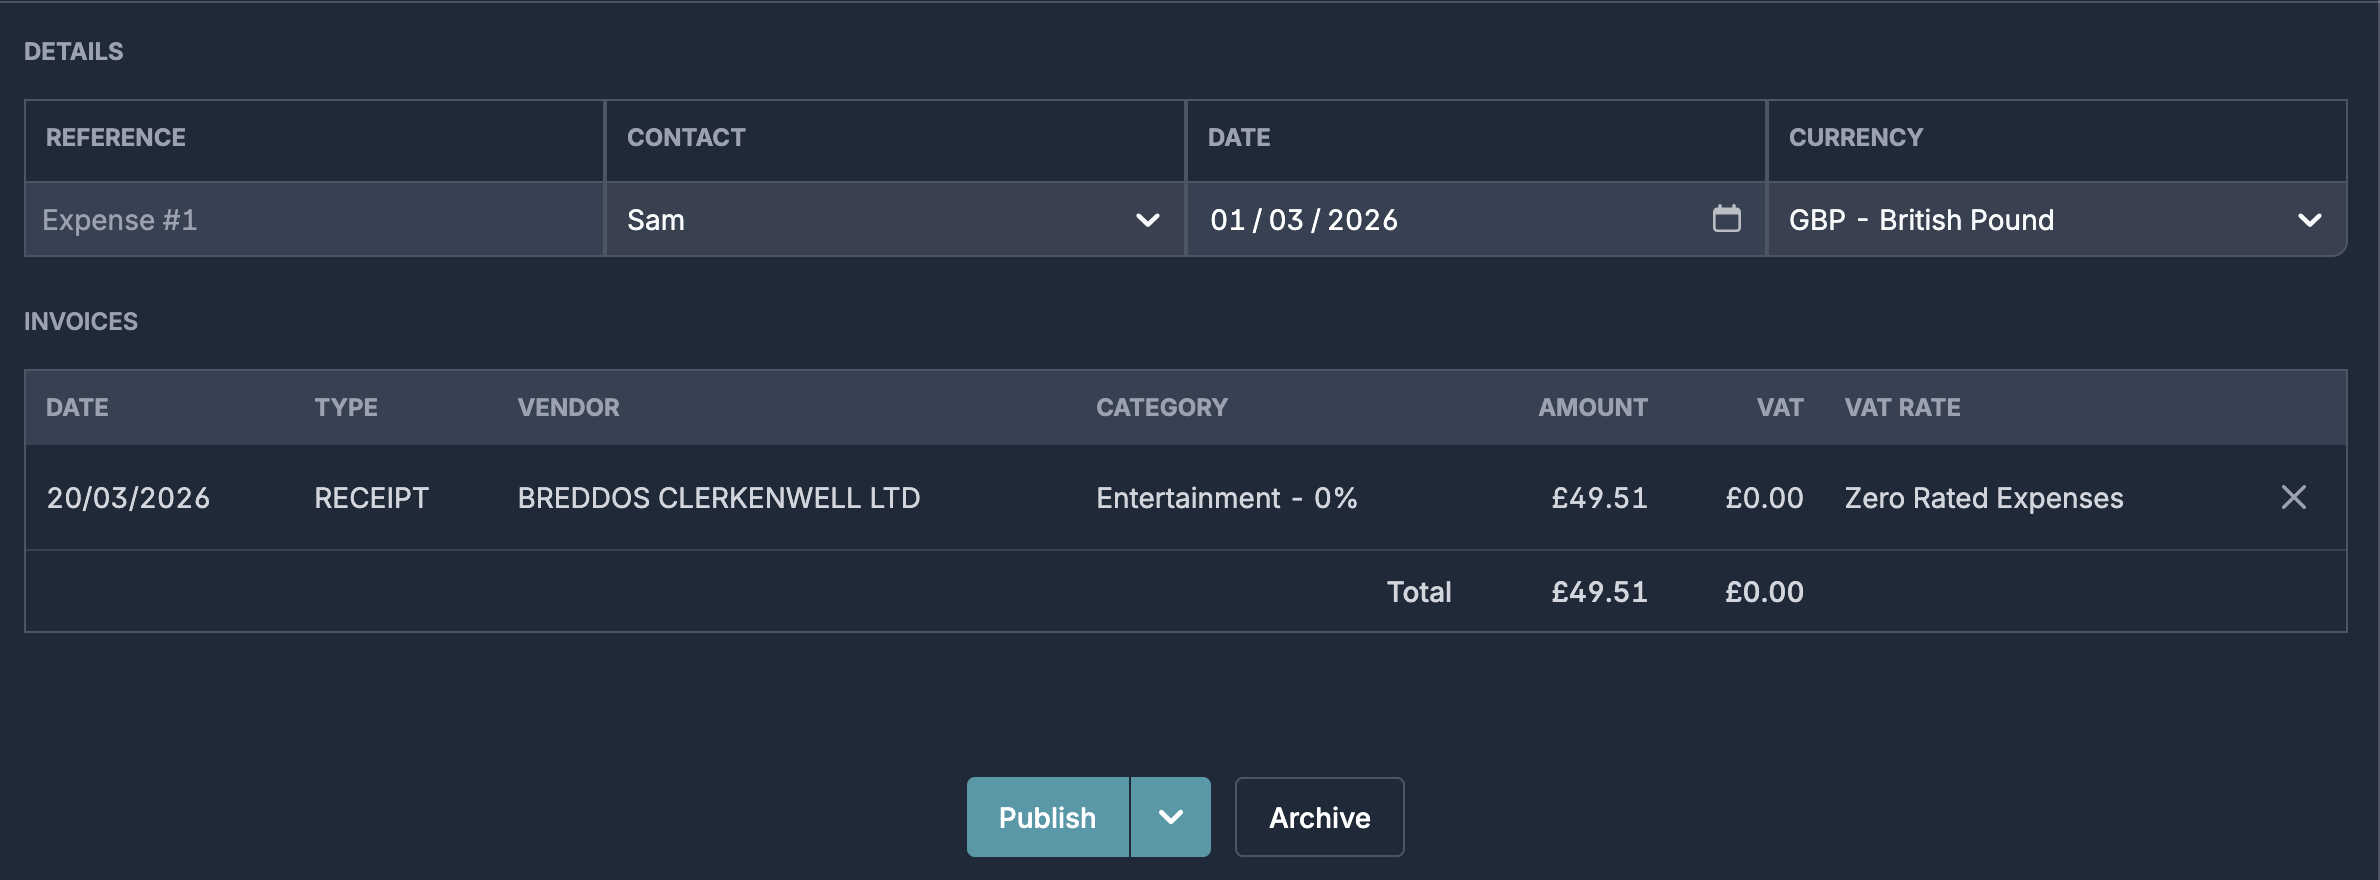
If you write “expense for Sam”, Briefcase matches Sam to an existing contact or creates a new one. If you just write “expense” without naming anyone, the claim is assigned to the person who uploaded the receipt.
Expense claims are grouped by claimant and invoice month. If Sam uploads three receipts dated in March, they all land in the same “Sam – March 2026” expense claim. A receipt dated in April creates a new claim automatically.
The grouping is based on the invoice date, not the upload date, so a late submission still ends up in the correct month.
Create expense claims manually
Select relevant invoices and click Expense claim on the bottom of the screen.
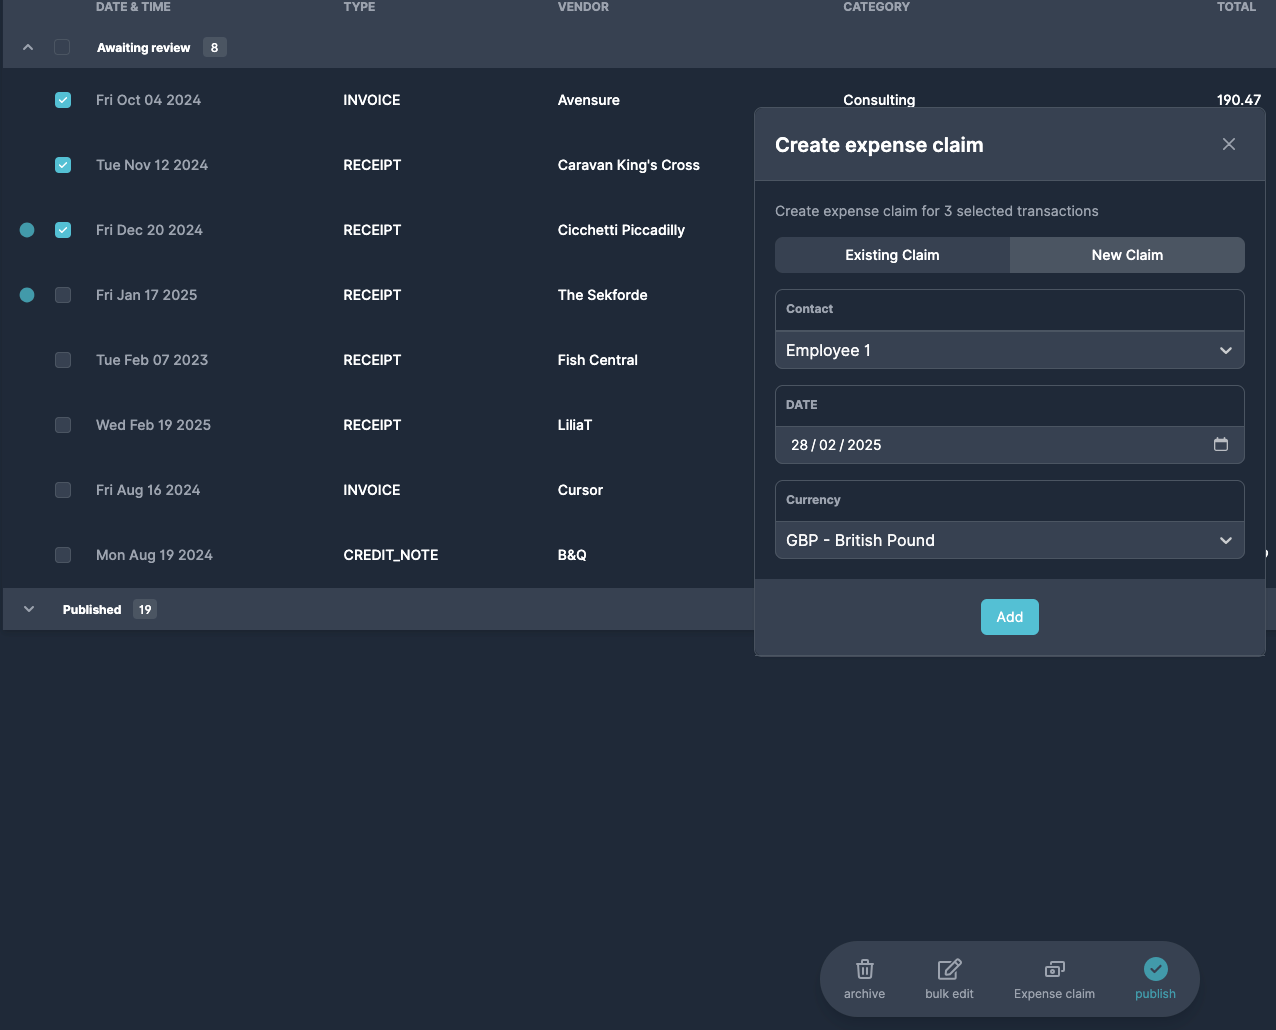
Assign relevant contact, you can create new contact by typing the name and clicking Add “Name” button.
Navigate to the expense claim inbox in the left menu and publish it.
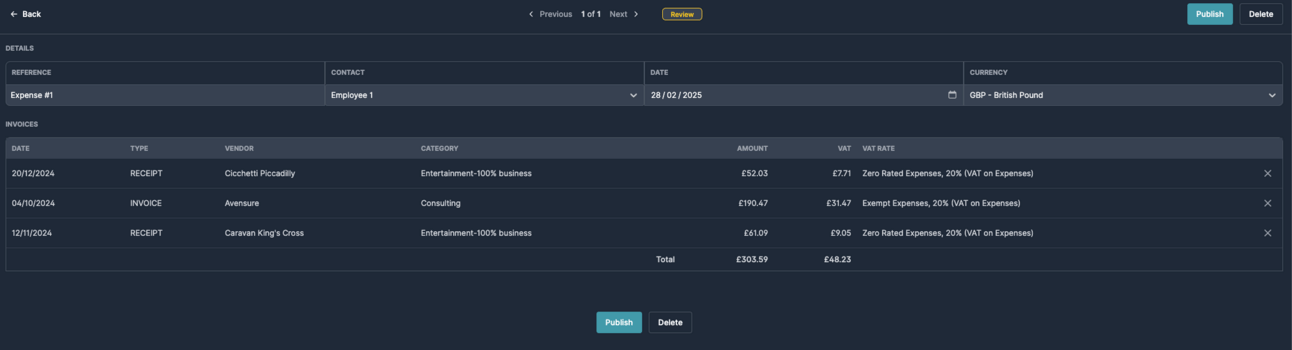
Expense claim is now available as new invoice in your Xero or QBO connection.
Use the "Source" field in the invoices inbox to identify documents submitted by employees for easy expense claim grouping.
Approving expense claims
You can use permissions to create a simple review process, with publishing acting as the approval step. A claim only reaches Xero or QuickBooks after someone with permission to publish it has reviewed it.
For the person submitting claims:
Go to Settings → Organisation → Team and select Permissions beside their name.
Choose Custom access.
Under Expense Claims, turn on View Own Only and Create. Leave Publish off.
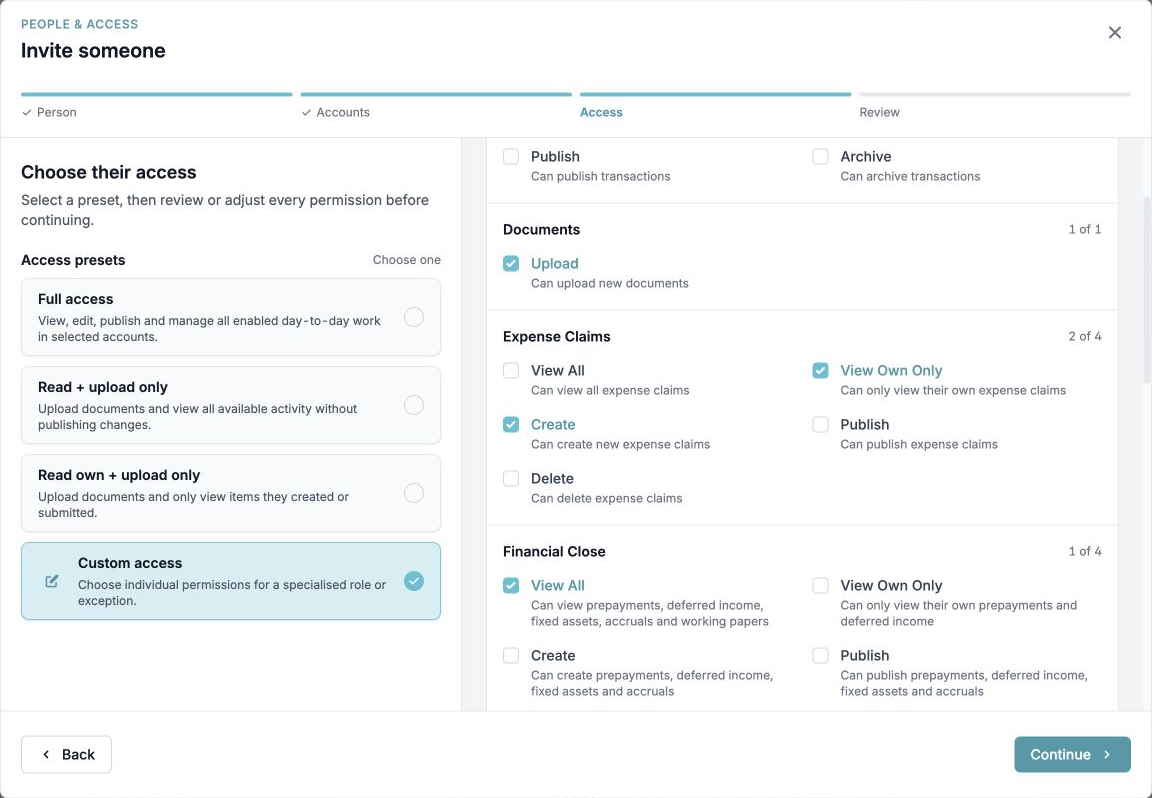
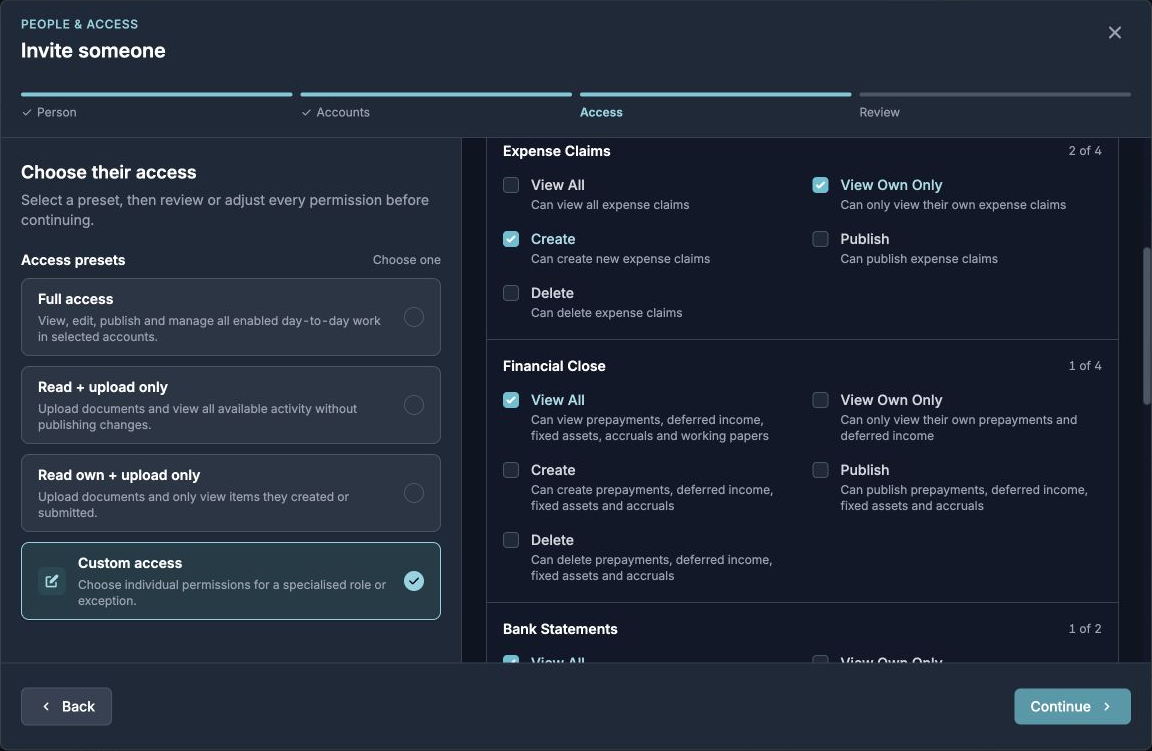
For the approver, turn on View All and Publish under Expense Claims.